Creating an Installer Using Visual Basic
6.0
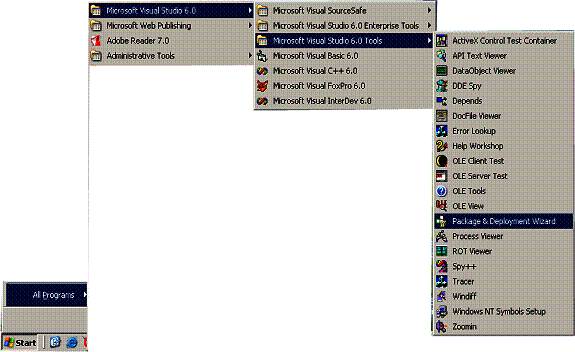
- Click on the Start Menu > Microsoft Visual Studio 6.0 > Microsoft Visual Studio 6.0 Tools > Package & Deployment Wizard.
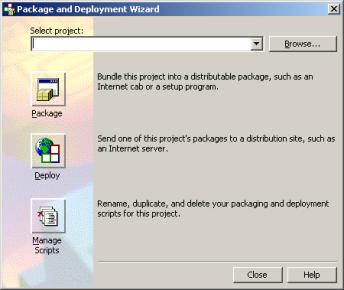
- Click on the “Browse” button next to the “Select Project” combo box, to select your project.
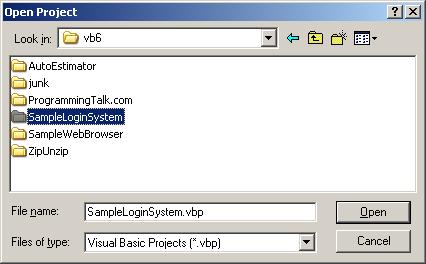
- Select the actual Project Solution File in the screen provided and hit Open.
- Click on the Package Icon To Continue.

- On the “Package and Deployment Wizard” Screen, select “Standard Setup Package” and hit “Next” button.

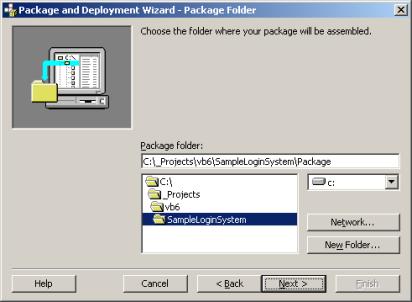
- Choose the folder where you want your setup package to be created, and click “Next”.
- If the folder you are selecting does not exist, you will receive a prompt asking you if you want to create it. Click on “Yes” to continue.

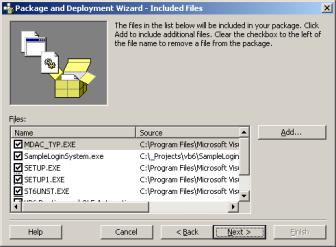
- You will be given a list of files that need to be included in your installer based on your application’s code and references. If you need to add any additional files like documentation, you can do it on this screen. Else, click next to continue.
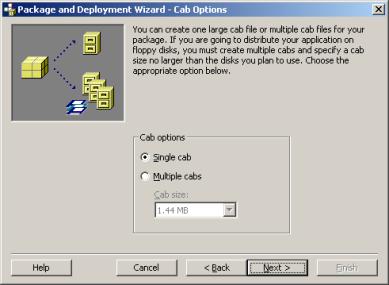
- The next screen will allow you to break down the installer file into multiple smaller files (in case you want to distribute your application on a floppy disk for example). If file size is not an issue, select “Single Cap” and hit “Next” to continue.
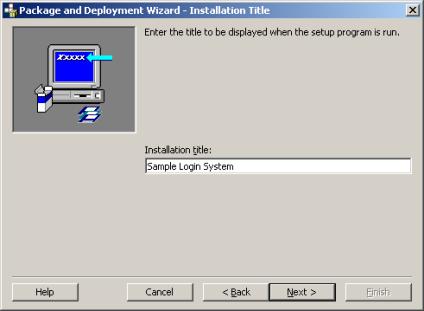
- Enter a title for your installer application and hit “Next”.
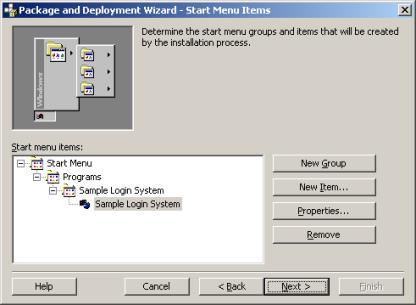
- Next, you will be asked what type of shortcut and where you want to place on your user’s Start Menu. Accept the default, and hit “Next” to continue.
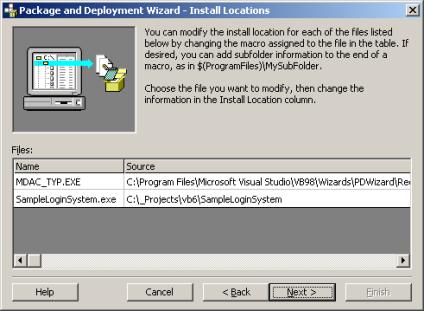
- Accept the Install location and hit “Next”. This is where the executable files are grabbed from.
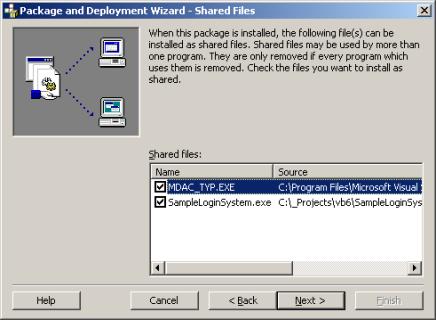
- Next, you will be given the option to install your application’s dependencies as shared installs. This means that if for example another program needs to use the MDAC database connectivity besides YOUR application, it will be able to do that. Check all the boxes provided and hit “Next” to continue.
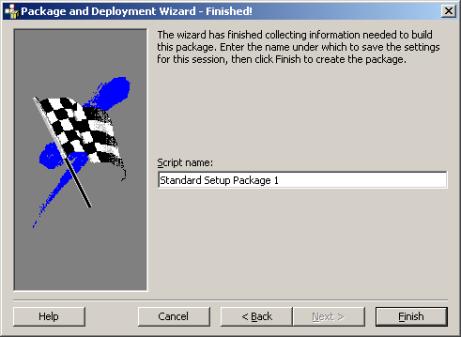
- Lastly, the setup wizard will ask you what name you want to give the setup application you just created. Enter a name desired and hit the “Finish” button.
- The wizard will go through and create the installer for you. Once done, it will display a report telling you the location of the installer that looks like this:

You will have the option of saving this displayed report if you need to. If not, hit close to finish the setup.
- Navigate to the directory specified in the report above, where your installer was created, here is what you will see.
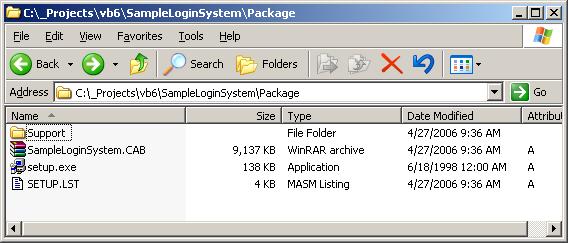
- Zip up everything you see in that directory into a zip file. This is the installer that you distribute to your users by either allowing them to download it from your website or by burning it to a CD and mailing it to them. They will have to run the “setup.exe” file to begin the installation.
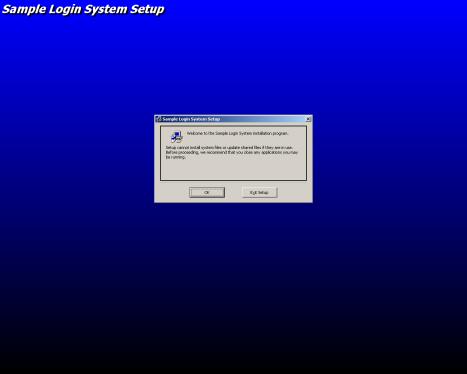
The actual setup screen that the users will see will look like this:
Comments? Questions? Issues?
Contact Us at webmaster@digioz.com or by visiting www.digioz.com for more information.
Pete Soheil
DigiOz Multimedia
April 27th, 2006